


Waking the Psoas
Waking the Psoas
Whether you’re an athlete or live an active lifestyle, at some point you may find yourself dealing with some nagging low back pain that just will not leave. It may come and go, it might only be present during a specific movement or activity, or it may be constant. When you get treatment, the benefits seem to only be temporary, and you might feel with your back you need to be careful when active otherwise it will “give out”. Well, the source of your pain may not have anything to do with your back muscles, it may be due to two muscles that lie deep within your abdomen and pelvis. The iliacus and psoas major, which often get grouped together and called your iliopsoas. Collectively these two muscles will attach to the lower part of your spine (lumbar), the inside of your hip bones, and fairly high up on the inside of your legs. This muscle works to flex and externally (laterally) rotate your hip, maintain the strength and integrity of your hip joint, and is used as a pelvic stabilizer when standing, sitting, walking and running. Now due to the increased sitting we do in our lives it is common that we will be told our psoas is tight and we need to stretch it and/or release it which when done will tend to give us temporary relief. However, another reason our psoas can always feel tight is because it is weak, or our brain’s awareness of the muscle has decreased giving a decreased neurological connection to it.
Now with all that said let’s awake the psoas!
First if you regularly have tightness in specific hip and low back muscles start off by using your massage ball, roller or massage gun of choice to work those areas first.
Next grab a percussion tool such as a massage gun, or a vibration tool such as a RockWave. Set the tool to one of the higher frequencies and use the tool over your iliopsoas on the side you have low back pain. This would mean starting to the left or right of your belly button in your abdomen and working down towards the inside of your leg. The vibration/percussion works to increase your brain’s awareness and connection with the muscle (“waking” it up). Constantly move the tool in all directions along the muscle, at a pressure that is comfortable for you for around 90 seconds. You may even notice a decrease in low back pain after doing this.
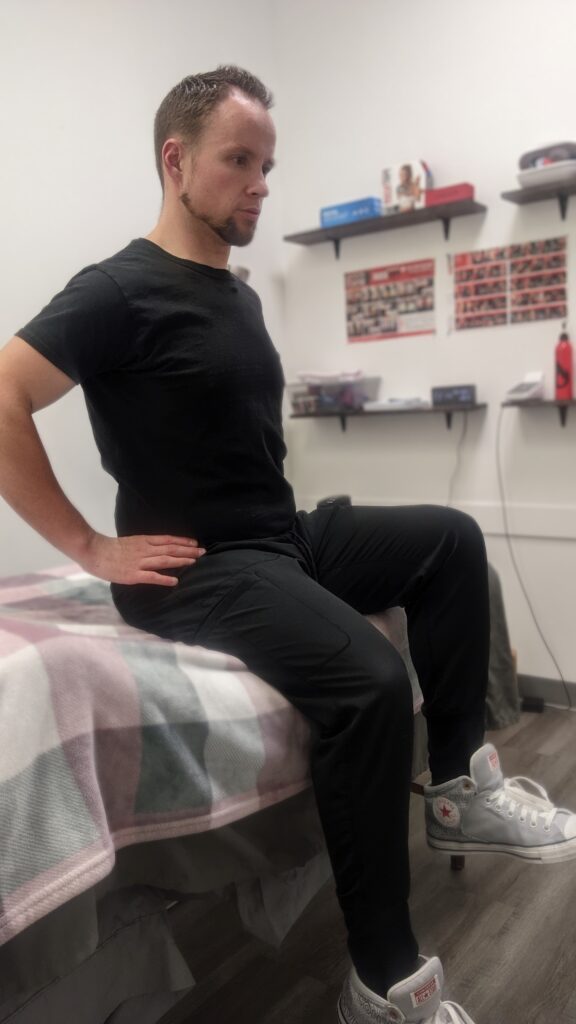
After completing that, sit so your feet are not touching the ground. Keep your upper body long and tall while maintaining relaxed belly breathing. Place your hands on your hips and raise the leg on the side you just used your percussion/vibration tool on. Lift your leg as high as you are able to without using your upper body to help (ie. leaning back, taking hands off hips, etc). Aim for working up to 20 reps for 2-3 sets. Once you can do this look to progress that exercise to something that relates to your sport or movement that is compromised by your psoas. For example, if you are a runner you may progress to doing a standing knee raise with a band around your ankle and anchored behind you for resistance.
Other symptoms that you may experience with a dysfunctional psoas can be groin pain, a “clicking” or “snapping” hip, buttock pain, pain with weight bearing or pain upon standing after being seated for an extended period. If you’ve had long-standing issues of low back pain with only getting temporary relief with treatment, and after reading this and trying the routine you feel your psoas might be the issue, book in with the treatment provider of your choice for further assessment and treatment prescription.
If you’ve already been working on strengthening your psoas or work with clients on this, what are some of your go-to exercises for psoas strengthening?
Tyler, Massage Therapist, and RockTape ambassador